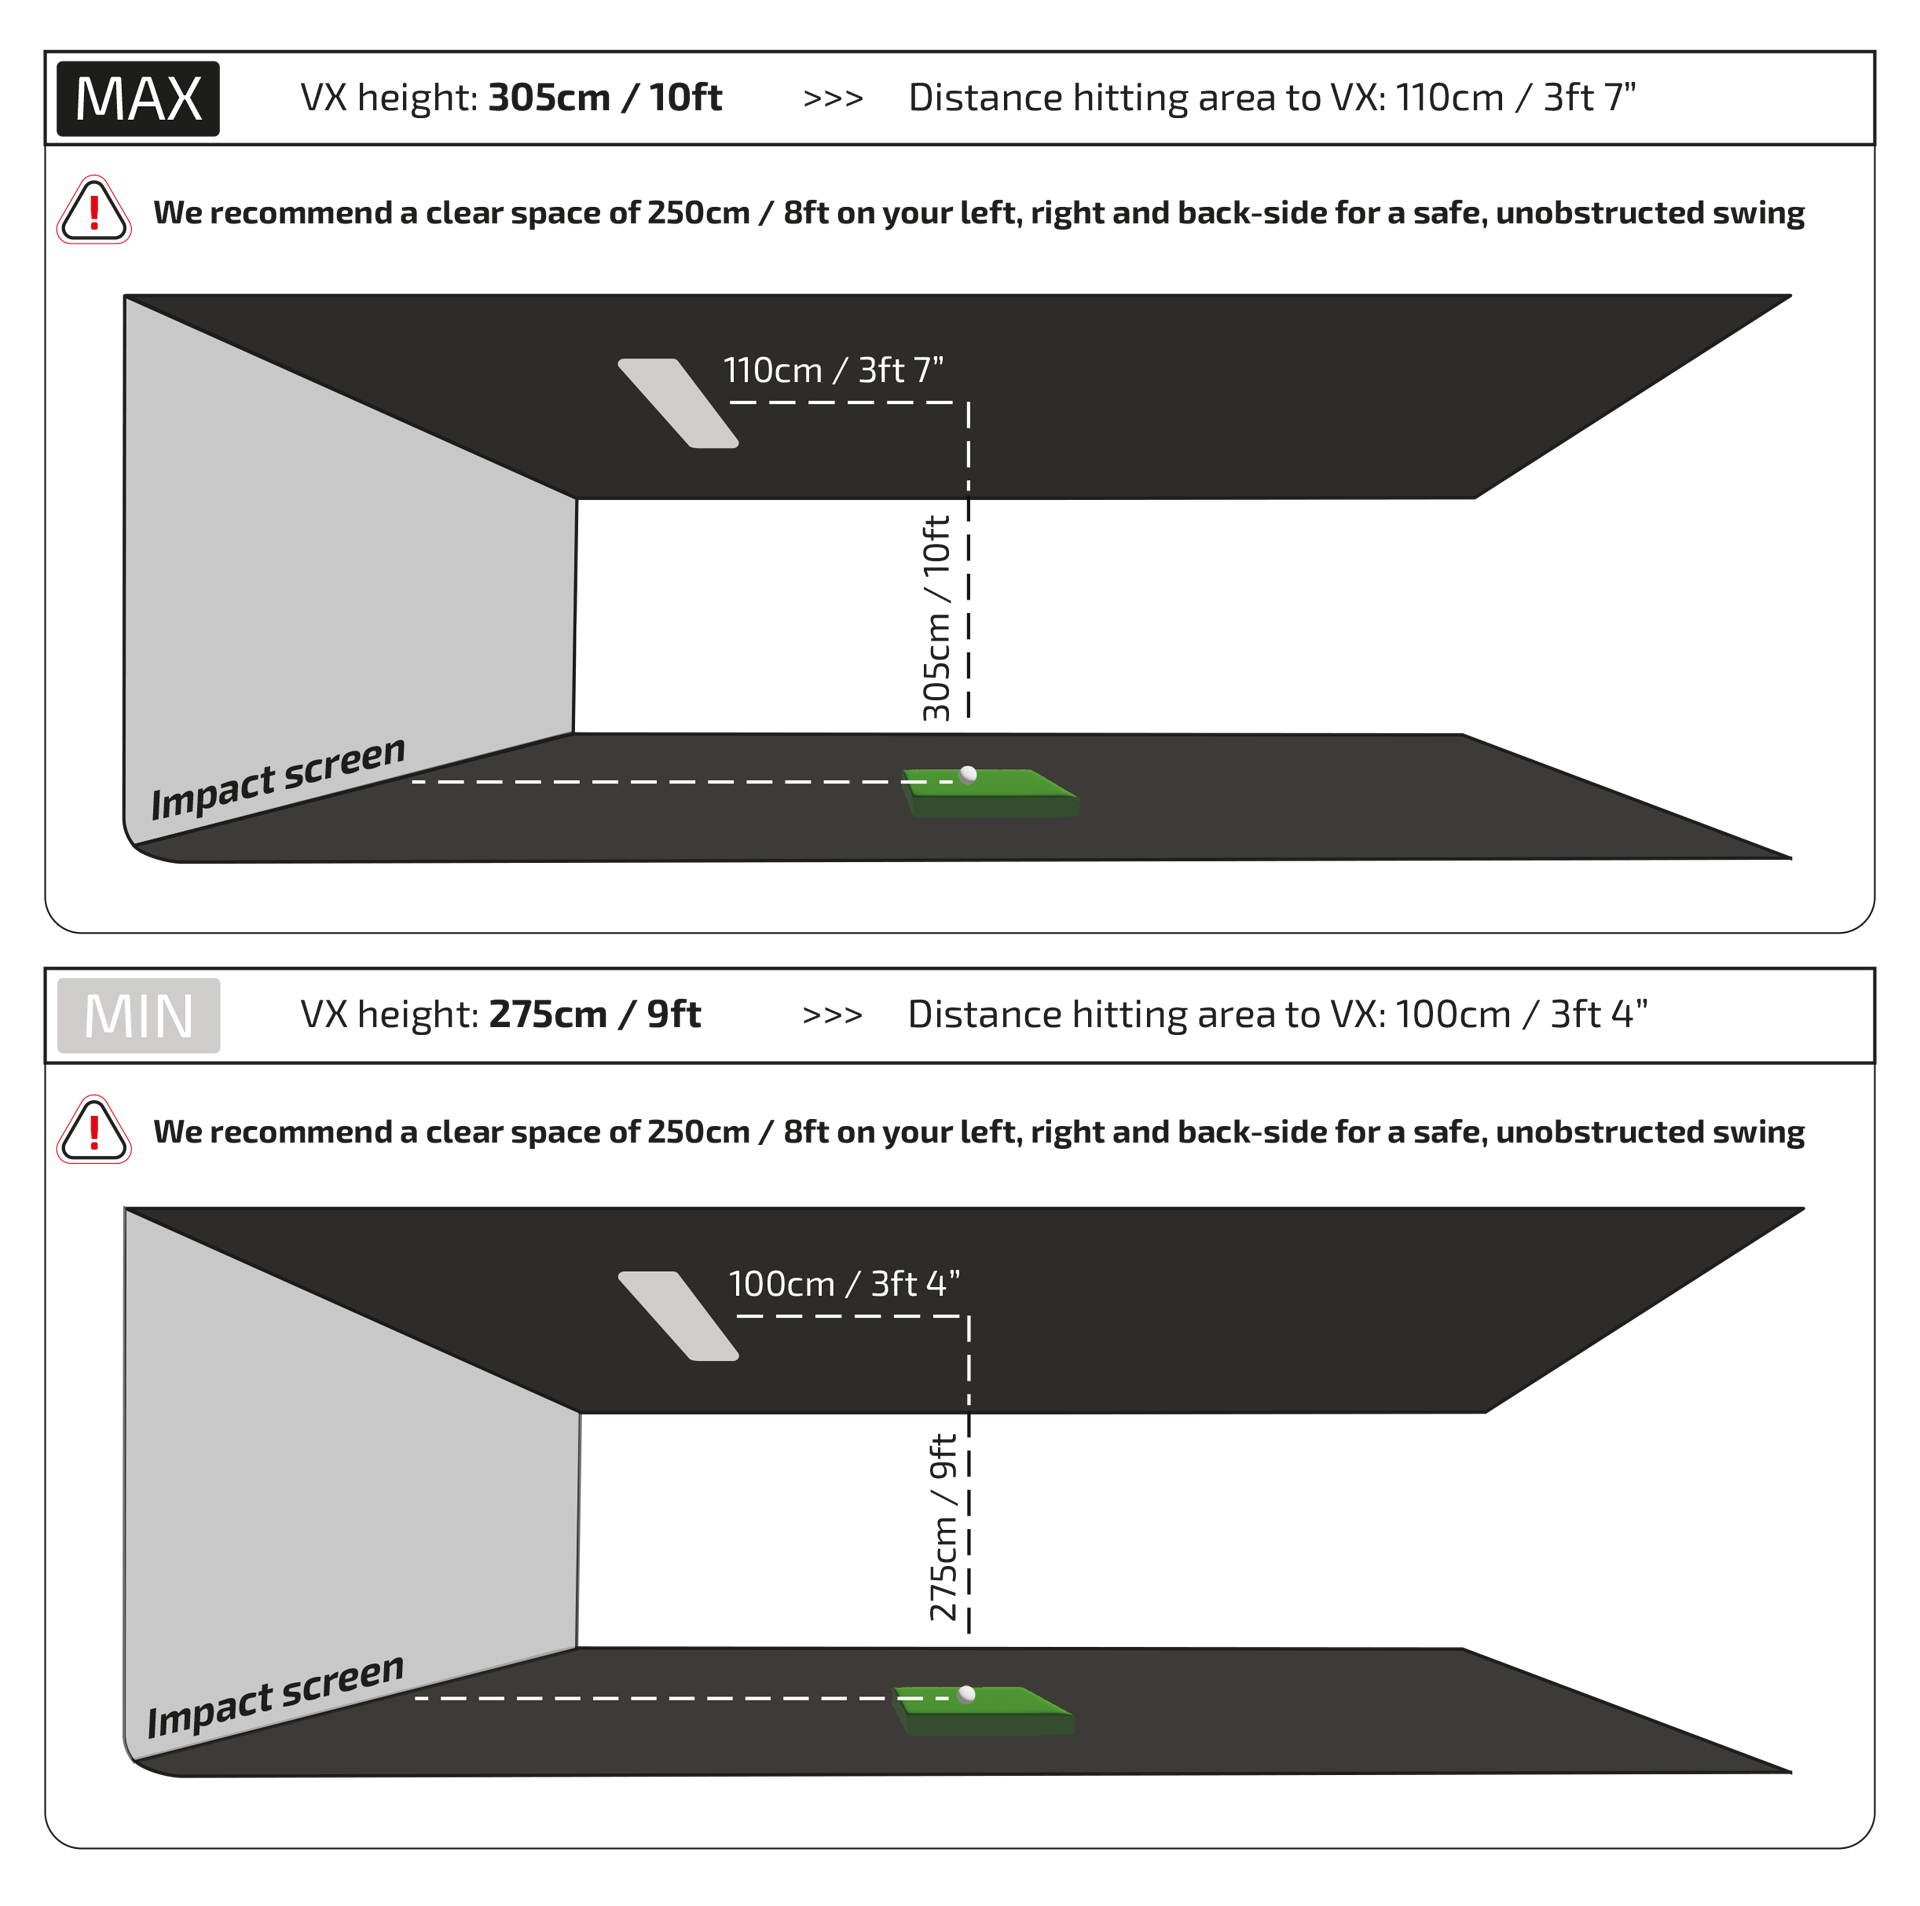
Below are the mounting guidelines for the VX launch monitor. Using these guidelines, position the ceiling mount plate correctly before continuing.
The VX does not require a specific distance from the impact screen to the hitting area. The VX will read the ball and club in the space between the hitting matt and the VX itself.
The height shown (305cm/10ft and 275cm/9ft) in the image below is measured from the ceiling to the hitting surface.
The width shown in the image below (110cm/3'7" and 100cm/3'4") is measured between the center of the ceiling mount and the center of the (65cmx55cm / 25"x21") hitting area.
Following the guidelines in step 1, use the 4 screws (and 4 plugs if needed) to attach the mount to the ceiling. Make sure the arrow on the mount is pointing towards the impact screen with the mount parallel with your impact screen.
Make sure the mount is horizontally and vertically aligned perfectly straight.
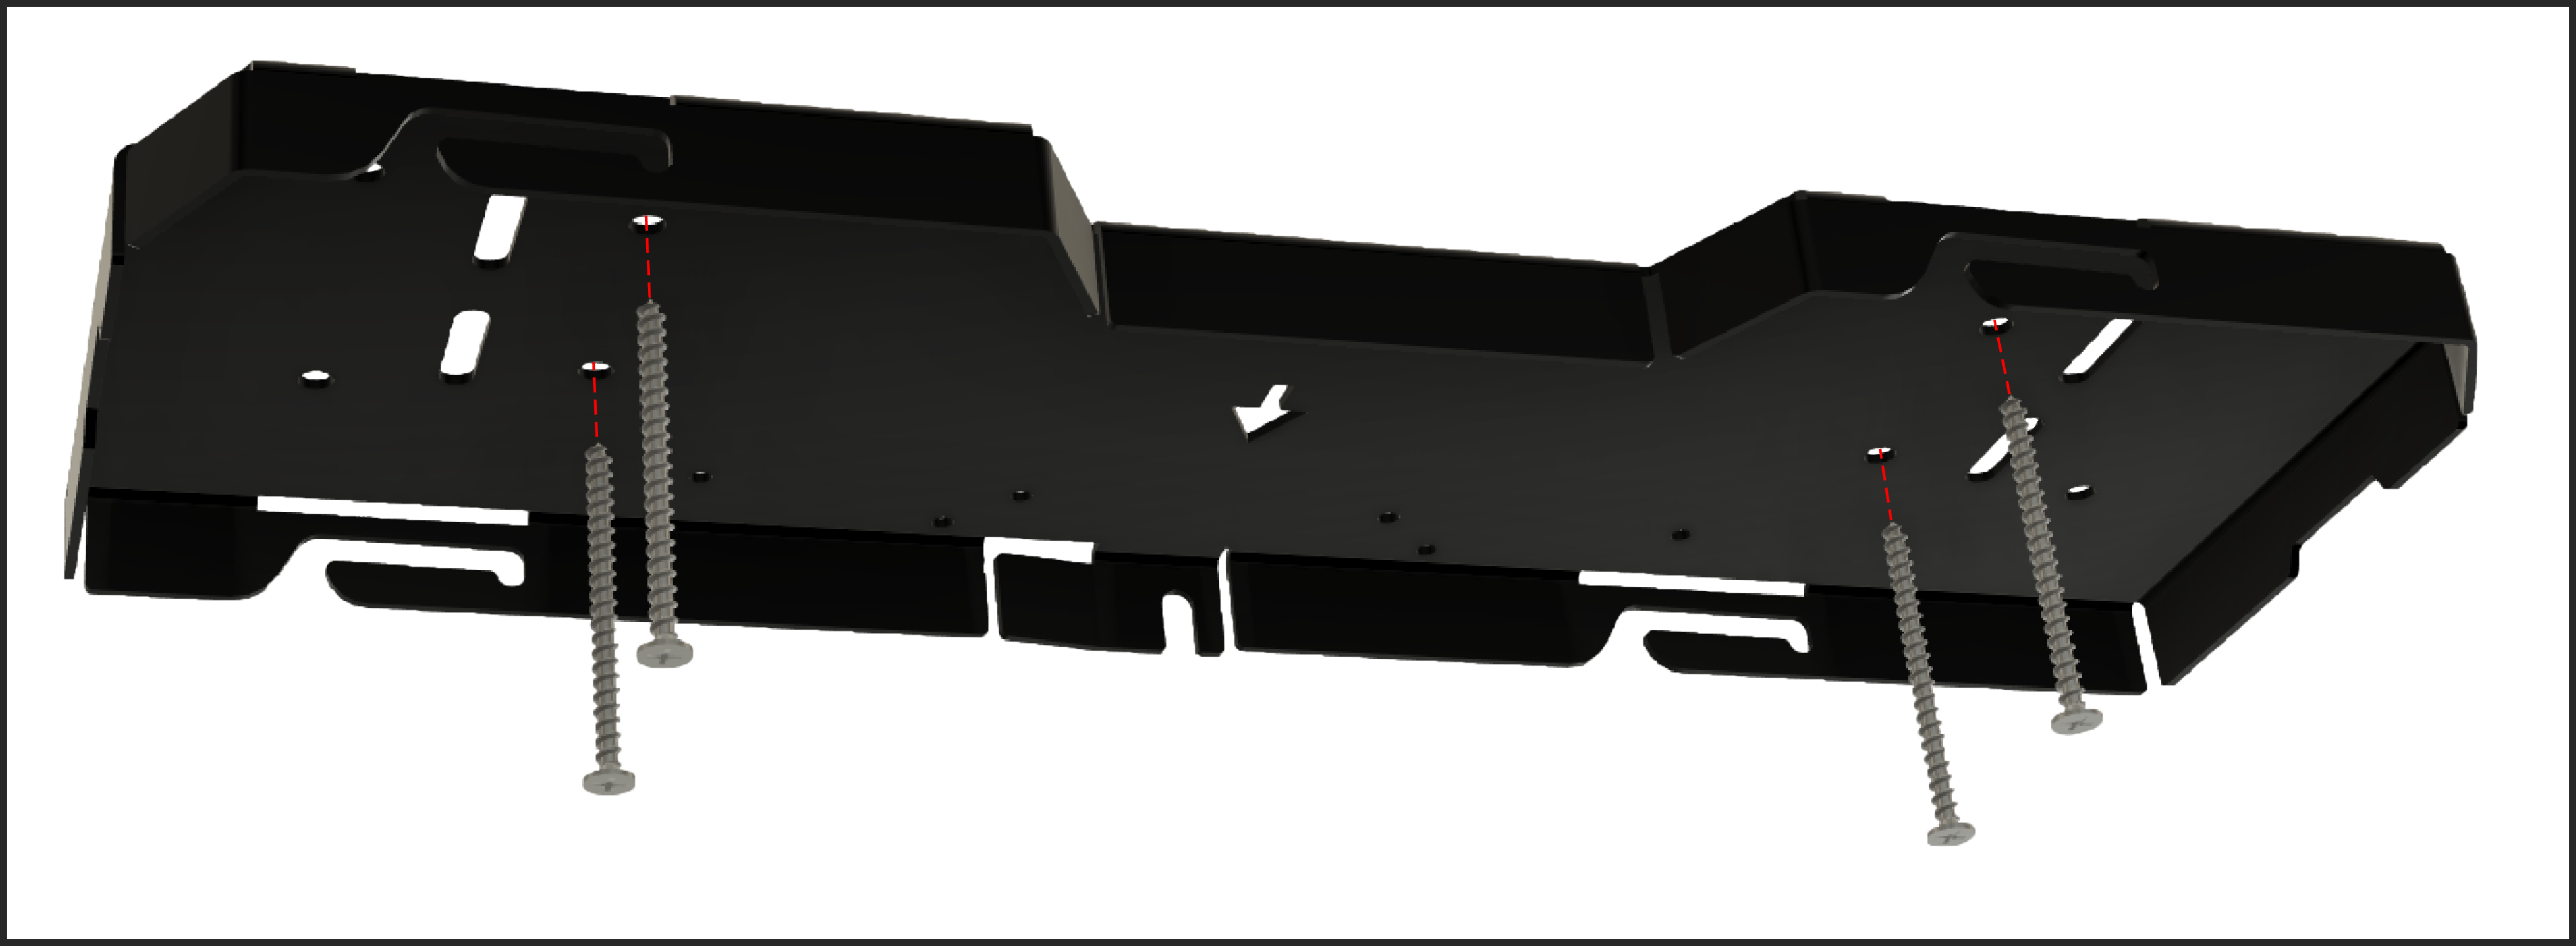
Ceiling mount plate - example screw positions
We strongly advise you to perform this step with 2 people.
Allign the VX Launch Monitor with the openings in the ceiling mount. Lift the system into the openings and slide the system to the left into the ceiling mount until the index plunger clicks into place.

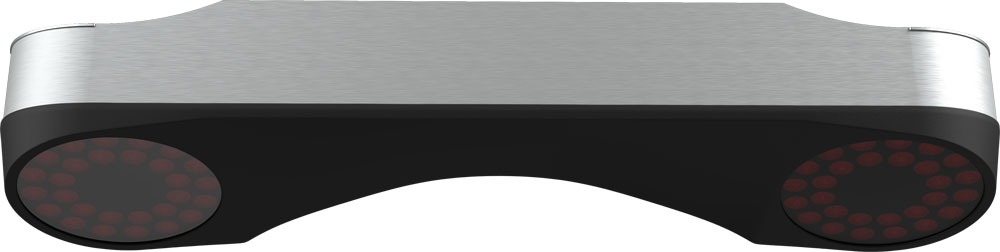
ProTee VX back view
Connect the power cable to your power outlet. Connect one end of the supplied 10m/32' Ethernet cable to the unit and one end to your computer ethernet network port.
If you hardwired your internet (not using WIFI for Internet), you can use the provided USB to 1Gb Ethernet adapter for your cabled internet connection. Make sure you connect the adapter to a blue USB3 port.

Switch on the Unit by pressing the red switch on the back of the VX. You will see the left and right LED ring lights switch on for a couple of seconds. The light will switch off automatically. The software, which will be installed in the next steps, will switch the lights on when needed.
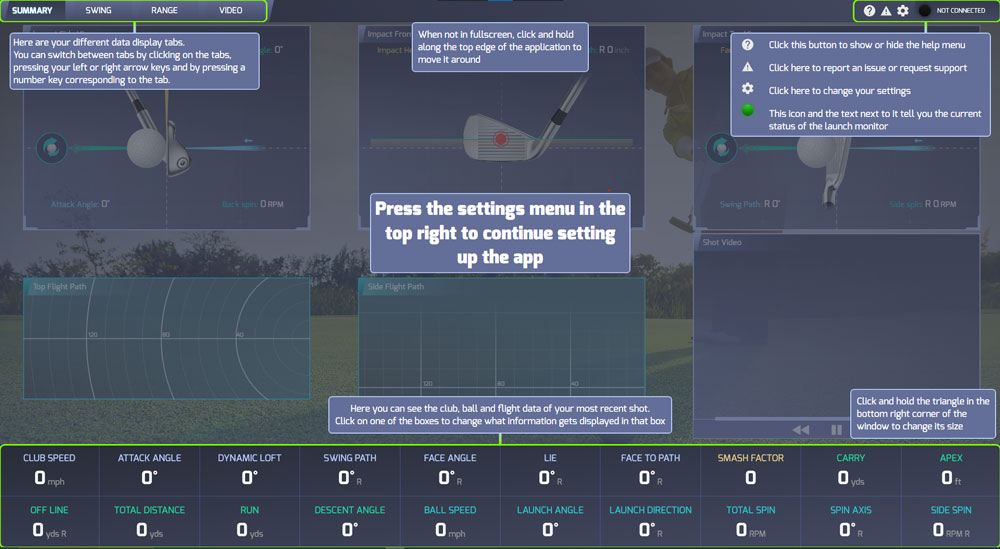
You are now ready to setup the software!
Download ProTee Labs using the following link:
https://download.protee-united.com/protee/proteelabssetup.exe
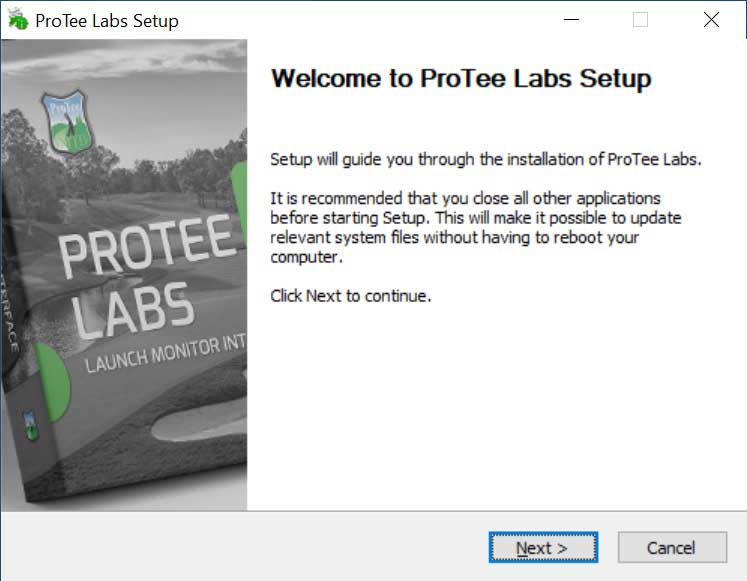
Run proteelabssetup.exe from your download folder and click next.
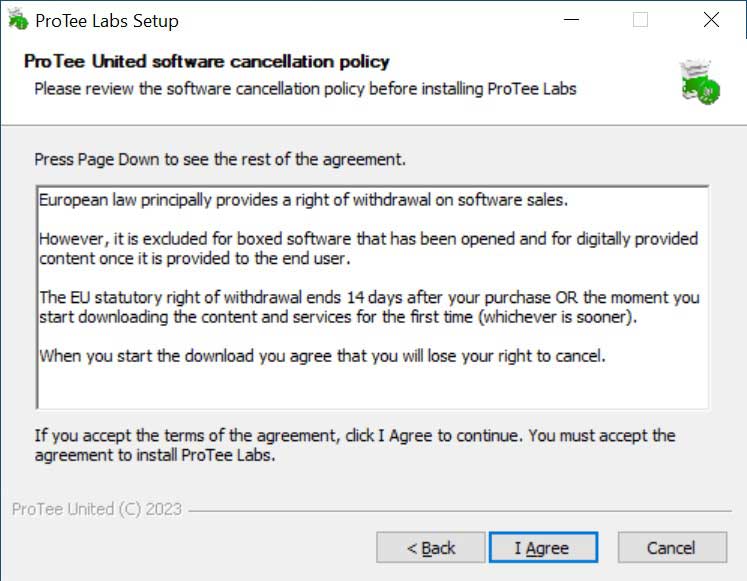
Accept the terms by clicking I Agree.
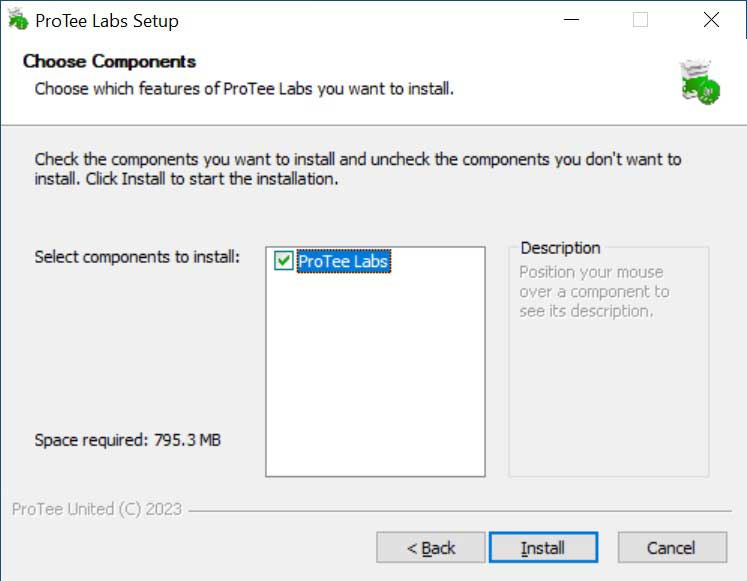
Select ProTee Labs and click next.

Click finish. A ProTee Labs icon will be created on your desktop.
ProTee Labs needs to be activated. When you first start ProTee Labs you can register and activate your software with the activation code you received from the reseller, shop or sales representative. Please contact the reseller if you did not receive an activation code.
The ProTee VX is equipped with 2 high speed cameras, which needs to be calibrated when used for the first time. Run the ProTee Labs program from your desktop to start the calibration process.
Step 1: Go to the settings of ProTee Labs.
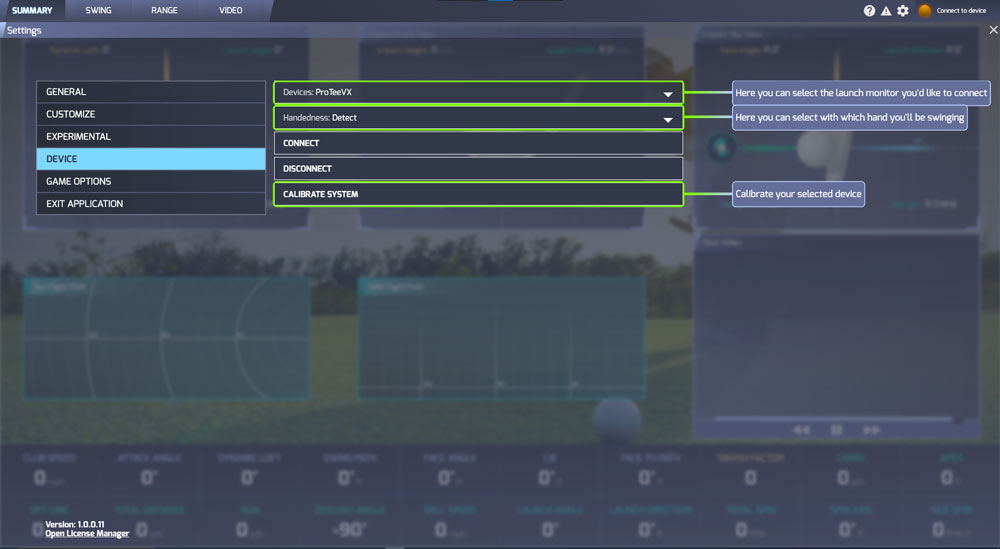
Step 2: Select the ProTeeVX from the list of devices and click CONNECT. Wait for the status on the top right to say "CONNECTED".
Step 3: When "CONNECTED" click CALIBRATE SYSTEM.

Step 4: Place the calibration board in the center of your play area.
Make sure the calibration board is pointed towards the screen and aligned straight with your HITTING MAT and SCREEN.
The alignment of the calibration board will show the cameras what is straight forward.
Level the calibration board using the supplied bubble level.
If you find later that the results are slightly off due to misalignment, you can recalibrate the VX at any time.
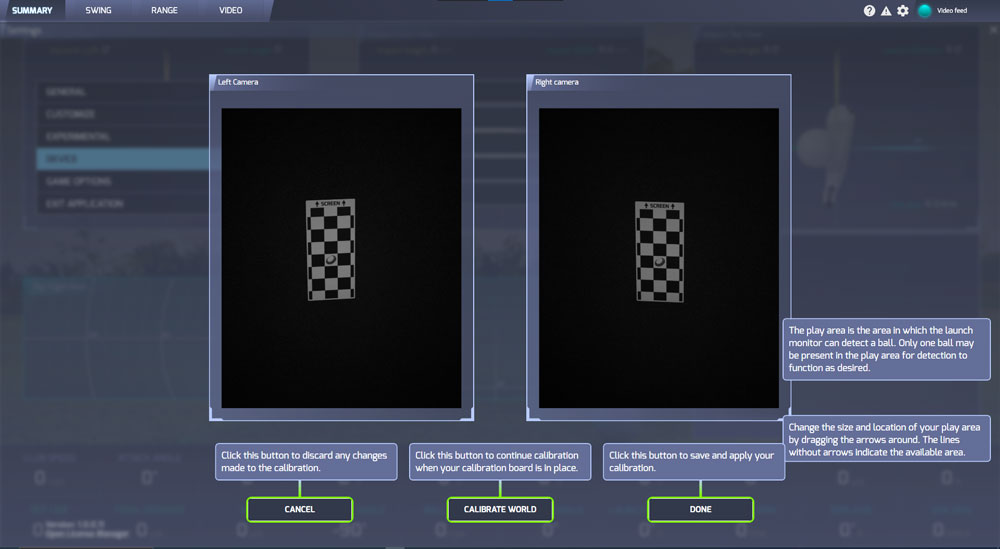
Step 5: Click CALIBRATE WORLD.

Step 6: Manually adjust your play area.
The play area defines the limits in which the VX will find your golf ball and detects shots.
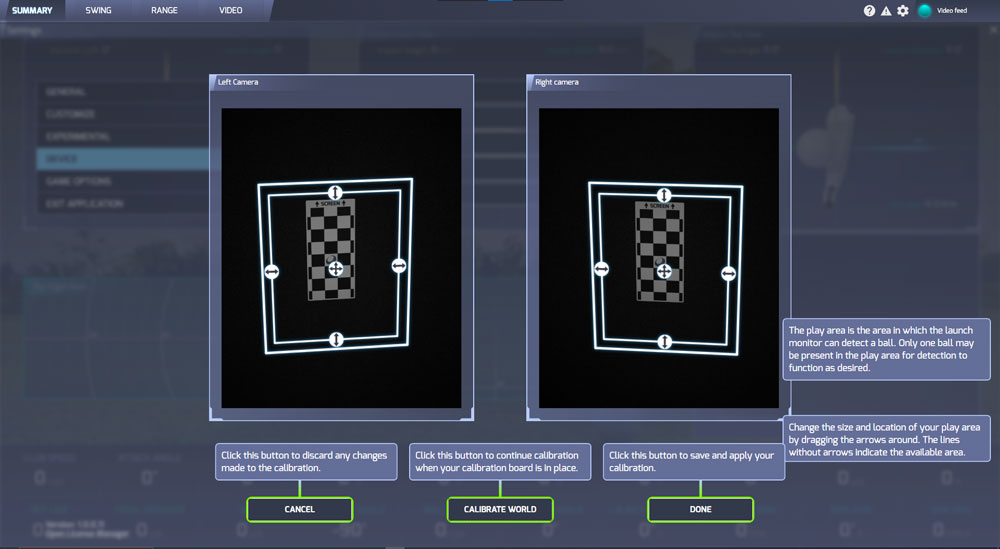
Step 7: Click DONE.
You will be returned to the settings screen. The VX will now try to find a golfball in the hitting area you just defined.

ProTee Labs will show the status of the unit in the top right corner. When the VX finds a ball in the hitting area, the status will change to "Ready for shot".
In case you have any questions or need any help, please send an email to our support team:
Visit the Launch Monitor section on our support website for frequently asked questions, instructions and tips:
You can find the ProTee Labs End User Manual here:
https://www.protee.wiki/articles/#!protee-labs-user-manual/getting-started